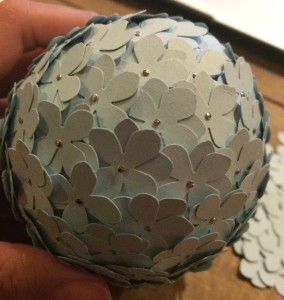
 I like being crafty and sometimes I find inspiration when I’m at one of those stores. You know, the stores you walk in to, fall in love with something, and try to decide if you really love it when you look at the price tag. Well, it’s Spring and it’s time to change out my Winter home decorations. I was walking through Pier 1 one day and saw some decorative spheres that I thought would look cute in a vase on my coffee table. After I got home, I looked through Pinterest and thought the tutorials from Ectetorize and Project Nursery were doable.
What you’ll need to make this (I found all of the materials at Michael’s.):
- Hydrangea Petal Punch (Martha Stewart three petal is what I bought, but you could get the one petal if it is available)
- 2 Sheets of Scrapbook Paper (8½ x 11 in)
- Around 100 Pins (Bridal and Lace Pins)
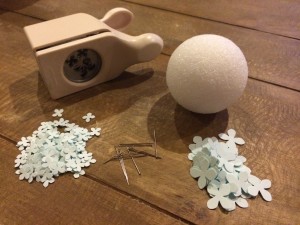
- Styrofoam Ball (2½ in diameter)
Start by punching out as many petals as you can from the scrapbook paper. If you have the single punch, you might be able to get away with using one piece of paper. The amount you need will depend on how closely you pin the petals together. I use the bigger petals for the 3 in or 2½ in balls and use the smaller petals for the 2 in balls.
Tip: There are always coupons for Michael’s!! If you don’t get the newspaper, don’t have a printer, or haven’t downloaded the Michael’s App yet, do yourself a favor and download it to your phone. I waited for a 40% off one item coupon to come out before purchasing it.
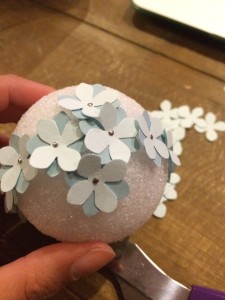
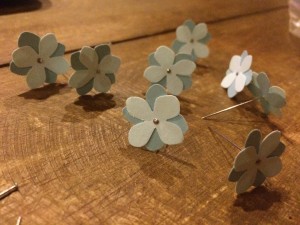 Layer two petals on top of each other a little staggered and place a pin through it. Curl the petals slightly. I make a bunch of these at a time to make my own little assembly line. Trust me, it goes faster this way (^_^). I couldn’t find pretty corsage pins with the ball in the size that I wanted, so I just went for the lace pins.
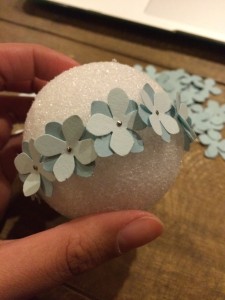
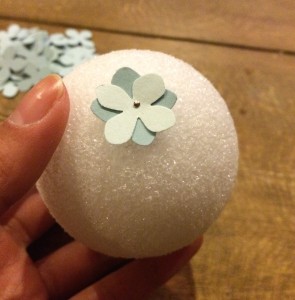 Pin one of the layered petals onto the Styrofoam ball. DON’T STRESS! It’s the first pin and it will get covered up by the remaining pins.
From here, you can take one of two routes. Option one, pin the petals in circular pattern, overlapping the petals a little. This will make it so you have your first petal surrounded by a circle of petals, surrounded by another circle of petals, and so on. The subsequent rows will overlap the bottom of the first circle. Repeat until covered.
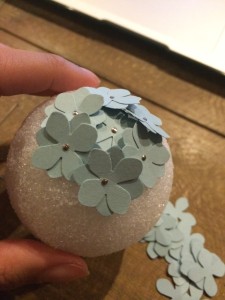
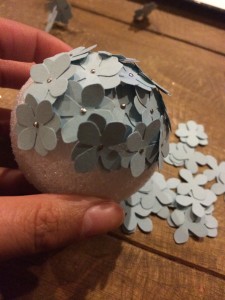
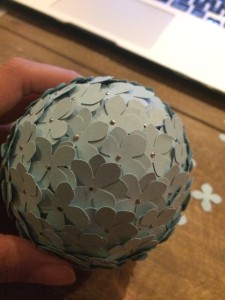 Option two, curl the petals more and place them adjacent to each other to cover up the Styrofoam. Keep going until you cover the entire ball.
I have mine in a glass vase, but they would be pretty hanging, in a bowl, in a bird cage, etc. The great thing about these is that you can punch out different colors for all of the different seasons and you can be super creative and mix the colors!!
Don’t worry, I’ll post about the twine covered balls and fabric balls next! (^_^)
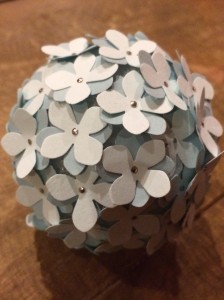
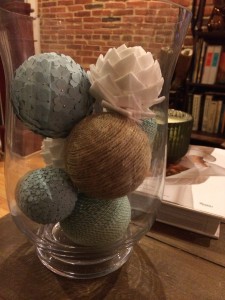
Love the decorative balls… Or maybe I just like typing it. AND saying it. AND giggling. While. I. Type. It. Balls. Decorative balls. That turned out pretty amazing 🙂 Maddy, you made some pretty balls. decorative balls ::giggles:: I love your [decorative] balls.
(^_^) decorative balls > decorative spheres (^_^)